SQLWorkbench build 125 configurare per PostgreSQL – debian 9.xx

SQLWorkbench è un SQL query tool free particolarmente efficace che supporta un ampio numero di DBMS. Scritto in Java è in grado di interfacciarsi con qualsiasi database per il quale sia disponibile un JDBC driver.  Essendo in java SQLWorkbench potrebbe essere eseguito in qualsiasi Sistema Operativo che disponga di JRE ( Java Runtime Environment).

L’ultima versione stabile è la Build 125 del 5 maggio 2019.
Release Note Build 125.
Con questa release si è avuto un cambio nel layout delle directory. Tutte le librerie addizionali ( es. esportazione excel ) ora si trovano nella sottodirectory /ext.
pertanto conviene effettuare il download con tutte le librerie opzionali che verranno posizionate correttamente.

 Tra i database supportati e testati non poteva mancare PostgreSQL. Di seguito i passi per “installare” e configurare SQLWorkbench per PostgreSQL.

Essendo in Java l’ applicativo SQLWorkbench prevede un package generico che va bene per tutti i sistemi. Di fatto non necessita di una vera installazione è sufficiente scaricare il pacchetto generico, decomprimere e lanciare lo script sqlworkbench.sh. Per poter utilizzare SQLWorkbench è necessario java JRE. Possiamo controllare la versione java disponibile con java -version

# java -version
openjdk version "1.8.0_212"
OpenJDK Runtime Environment (build 1.8.0_212-8u212-b03-2~deb9u1-b03)
OpenJDK 64-Bit Server VM (build 25.212-b03, mixed mode)

per installare Oracle JRE  manualmente su macchina linux si può fare riferimento  al post   Oracle Java Runtime 8 installazione manuale – versione 8.121 – Debian 8.xx 64 bit

Configurare e Installare SQLWorkbench per PostgreSQL


Il pacchetto SQLWorkbench è disponibile alla pagina

http://www.sql-workbench.net/downloads.html

Per poter interagire con postgresql serve inoltre lo specifico driver JDBC.

Aggiornamento il 18/06/2019 a distanza di circa un anno è stata rilasciata la nuova versione del driver jdbc: PostgreSQL JDBC Driver 42.2.6.
Il driver che andra opportunamente configurato in SQL workbench è scaricabile all’indirizzo

https://jdbc.postgresql.org/download.html

Operando con il terminale

scegliamo la directory opt per l’applicazione quindi

su 
mkdir /opt/sqlworkbench
cd /opt/sqlworkbench

SQLWorkBench 125 con le librerie opzionali occupa circa 26MB e può essere scaricato con

# wget http://www.sql-workbench.eu/Workbench-Build125-with-optional-libs.zip ... Workbench-Build125-with-op 100%[=======================================>]  26.40M  1.03MB/s    in 26s  wget http://www.sql-workbench.eu/Workbench-Build125-with-optional-libs.zip

Decomprimiamo il pacchetto con

# unzip Workbench-Build125-with-optional-libs.zip 

Rendiamo eseguibile per tutti gli users lo script di avvio workbench.sh

# chmod a+x sqlworkbench.sh 

La pagina con i JDBC Drivers di Postgresql
https://jdbc.postgresql.org/download.html
il nuovo PostgreSQL JDBC Driver 42.2.6 (16-06-2019) è scaricabile da terminale con

# cd ext 
# wget https://jdbc.postgresql.org/download/postgresql-42.2.6.jar

Volendo si può creare un link simbolico nel desktop con

ln -s /opt/sqlworkbench/sqlworkbench.sh sqlworkbench

avviamo.

Come per le versioni precedenti all’ avvio la finestra in primo piano è quella per creare un profilo di connessione.

Per connettersi a postgresql è necessario a questo punto configurare il driver.

  • Click sul pulsante Manage Drivers
  • In primo piano ci sarà  una nuova finestra Manage drivers
  • Selezionare postgreSQL dall’ elenco di destra con i DBMS supportati
  • Click sul pulsante cartella in alto a sinistra e selezionare il file driver JDBC per postgresql. Evidenziato in giallo era stato precedentemente scaricato nella cartella ext. Premere Open apparirà nella Library il driver .jar quindi premere OK.
  • a questo  punto è possibile completare il profilo di connessione

Si dovrà inserire:

  • nome per la connessione
  • nell URL:  host, porta e database
  • username e password

Collegamento a server postgresql AWS via tunnel ssh 127.0.0.1:54325 porta 54325 ( ssh tunnel per accedere a servizi http, postgresql, samba in remoto )

Ricercare una stringa in tutto il database postgresql

SQLworkbench in azione. Grazie alla funzione  WbGrepData è possibile ricercare una stringa in qualsiasi campo (field) di tutte le tabelle del database. In questo caso la ricerca della stringa Zeus

WbGrepData -searchValue=Zeus -tables=public.* -types=table

viene riscontrata in 18 tabelle postgresql. Tutte chiaramente visualizzate.

Database Compatibili con SQLworkbench

Risorse:

Installare Pgadmin 4 versione 2.0 in debian 9.xx – Python Wheel

pgAdmin è la più popolare e completa applicazione open source per l’amministrazione di postgresql il database SQL ad oggetti opensource più avanzato disponibile.

La versione 4.0 di Pgadmin è stata completamente riscritta usando Python,  Jquery e Bootstrap e il framework Flask. E’ disponibile in forma di applicazione desktop in  C++ con Qt e come applicazione web.
La precedente versione Pgadmin III non è al momento più supportata.
In ottobre 2017 è stata rilasciata la versione 2.0 di pgAdmin  4.0 .

Installare pgadmin 4 v 2.0 in debian 9.xx come web application modalità desktop

Per installare  pgadmin 4 in debian come applicazione web è necessario installare una serie di pacchetti per avere a disposizione Python e in particolare un Python Virtual Environment.

# su
# apt-get install build-essential libssl-dev libffi-dev libgmp3-dev virtualenv python-pip libpq-dev python-dev

Si può controllare la versione di python disponibile con

# python -V
  Python 2.7.13

Creare l’ambiente virtuale python 

Si può creare l’ambiente virtuale nella directory /opt utilizzando ad esempio  la directory py-env

# cd /opt
# mkdir py-env
# cd py-env

creiamo l’ambiente virtuale python

# virtualenv pgadmin4.2
# cd pgadmin4.2
# source bin/activate

Download e installazione pgadmin4 python wheel

Effettuare il download di pgadmin 4 v.2  python Wheel con

# wget https://ftp.postgresql.org/pub/pgadmin/pgadmin4/v2.0/pip/pgadmin4-2.0-py2.py3-none-any.whl

e installare con

# pip install pgadmin4-2.0-py2.py3-none-any.whl

Creare il file di configurazione locale di pgadmin4

per utilizzare pgadmin4 in modalità single user

# touch lib/python2.7/site-packages/pgadmin4/config_local.py
# echo "SERVER_MODE = False" >> lib/python2.7/site-packages/pgadmin4/config_local.py

Avviare pgadmin4 v 2.x come web application

per avviare usare il comando python lib/python2.7/site-packages/pgadmin4/pgAdmin4.py

(pgadmin4.2) root@deb9:/opt/py-env/pgadmin4.2# python lib/python2.7/site-packages/pgadmin4/pgAdmin4.py
 Starting pgAdmin 4. Please navigate to http://127.0.0.1:5050 in your browser.

Come indicato nel messaggio che appare a terminale puntare il browser all’indirizzo locale 127.0.0.1 porta 5050 è si avrà a disposizione la web application

per impostare user e password di login lanciare

lib/python2.7/site-packages/pgadmin4/setup.py

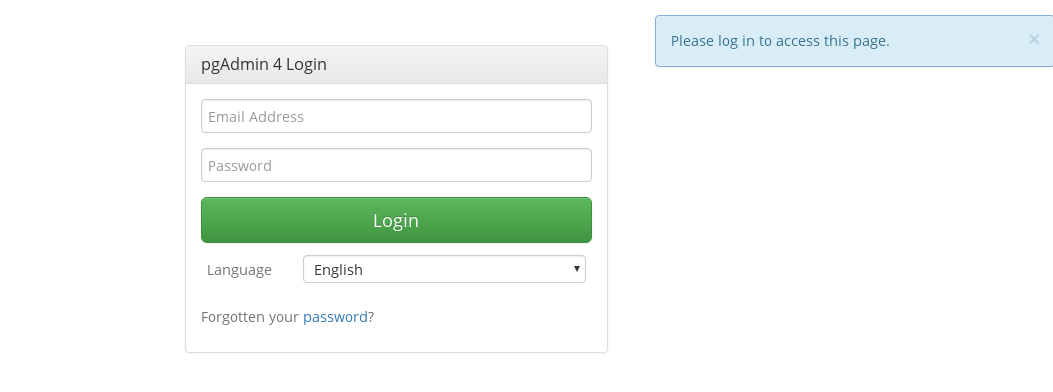
pgadmin4_login

Accedere a pgadmin4  da computer remoto 

Per accedere a pgadmin4 da computer remoto  si può ad esmepio editare il file di configurazione

/opt/py-env/pgadmin4.2/lib/python2.7/site-packages/pgadmin4/config.py

e cambiare il paramentro DEFAULT_SERVER indicando 0.0.0.0 oppure l’indirizzo ip spcifico

...
# ORI
# DEFAULT_SERVER = '127.0.0.1'
# NEW
DEFAULT_SERVER = '0.0.0.0'
...

Avvii successivi

Per gli avvi successivi di pgadmin4 phyton wheel

su 
cd /opt/py-env/pgadmin4.2
source bin/activate
python lib/python2.7/site-packages/pgadmin4/pgAdmin4.py

Per installare pgadmin in modalità server non creare il file config_local.py

Risorse posts/pagine utili :

Postgresql :

Come Configurare SQLWorkbench per PostgreSQL

SQLWorkbench è un SQL query tool free particolarmente efficace che supporta un ampio numero di DBMS. Scritto in Java è in grado di interfacciarsi con qualsiasi database per il quale sia disponibile un JDBC driver.  Essendo in java SQLWorkbench potrebbe essere eseguito in qualsiasi Sistema Operativo che disponga di JRE ( Java Runtime Environment).  L’ultima versione stabile è la Build 123 del settembre 2017.  Tra i database supportati e testati non poteva mancare PostgreSQL. Di seguito i passi per “installare” e configurare SQLWorkbench per PostgreSQL.

Per poter utilizzare SQLWorkbench è necessario java JRE. Possiamo controllare la versione java disponibile con java -version

# java -version
openjdk version "1.8.0_151"
OpenJDK Runtime Environment (build 1.8.0_151-8u151-b12-1~deb9u1-b12)
OpenJDK 64-Bit Server VM (build 25.151-b12, mixed mode)

per installare Oracle JRE  manualmente su macchina linux si può fare riferimento  al post   Oracle Java Runtime 8 installazione manuale – versione 8.121 – Debian 8.xx 64 bit

Configurare e Installare SQLWorkbench per PostgreSQL

SQLWorkbench non necessita di una vera installazione è sufficiente scaricare il pacchetto generico per tutti i S.O e decomprimere lanciare lo script  sqlworkbench.sh.
Il pacchetto è disponibile alla pagina

http://www.sql-workbench.net/downloads.html

Per poter interagine con postgresql serve inoltre lo specifico driver JDBC scaricabile all’indirizzo che andra opportunamente configurato in SQL workbench.

https://jdbc.postgresql.org/download.html

Operando con il terminale

scegliamo la directory opt per l’applicazione quindi

su 
mkdir /opt/sqlworkbench
cd /opt/sqlworkbench

scarichiamo il pacchetto con l’ultima versione stable di SQLWorkBench 123 e l’ultima versione  del driver JDBC 42.2.1

wget http://www.sql-workbench.net/Workbench-Build123.zip

wget https://jdbc.postgresql.org/download/postgresql-42.2.1.jar


Decomprimiamo il pacchetto con

unzip Workbench-Build123.zip

Rendiamo eseguibile per tutti gli users lo script di avvio workbench.sh

chmod a+x sqlworkbench.sh 

exit

Volendo si può creare un link simbolico nel desktop con

ln -s /opt/sqlworkbench/sqlworkbench.sh sqlworkbench

avviamo

La finestra in primo piano che viene presentata e quella per creare un profilo di connessione.

Per connettersi a postgresql è necessario a questo punto configurare il driver.

  • Click sul pulsante Manage Drivers
  • In primo piano ci sarà  una nuova finestra Manage drivers

  • Selezionare postgreSQL dall’ elenco di destra con i DBMS supportati
  • Click sul pulsante cartella in alto a sinistra e selezionare il file driver JDBC per postgres scaricato che apparirà nella Library e premere OK.
  • a questo  punto è possibile completare la il profilo di connessione

Si dovrà inserire:

  • nome per la connessione
  • nell URL:  host porta e database
  • username e password

SQLworkbench in azione grazie alla funzione  WbGrepData
viene ricercata la presenza della stringa Zeus in qualsiasi campo (field) di tutte le tabelle del database. 7 le tabelle riscontrate.

Database Compatibili con SQLworkbench


Risorse:


installare Postgresql 9.6 su Centos 7.4 64 bit

postgresql  go to:  PostgreSQL nel blog 

Default postgresql server in Centos 7 x86 64 is version 9.2.x

to install postgresql 9.6.x use   Postgresl yum repository.

https://www.postgresql.org/download/linux/redhat/

su -

Download and install the yum rpm PostgreSQL Repository

yum install https://download.postgresql.org/pub/repos/yum/9.6/redhat/rhel-7-x86_64/pgdg-centos96-9.6-3.noarch.rpm

We can use yum list to check the package now available.

yum list postgresql*

you have to see many postgresql96 packages

Install, inizialize and start postgresql 9.6.

install the client

yum install postgresql96

Install th server postgresql 9.6 with contrib package.

yum install postgresql96-server postgresql94-contrib

Than we initialize and start postgresql-9.6

#/usr/pgsql-9.6/bin/postgresql96-setup initdb
Initializing database ... OK
# systemctl enable postgresql-9.6
Created symlink from /etc/systemd/system/multi-user.target.wants/postgresql-9.6.service to /usr/lib/systemd/system/postgresql-9.6.service.

# systemctl start postgresql-9.6

postgresql-9.6 /bin /lib /doc /share are in directory

/usr/pgsql-9.6

postgresql-9.6 data are in directory

/var/lib/pgsql/9.6

check that everything is OK

su - postgres  
pslq -l

we have to see a list of 3 databases

Firewall

Open postgresql port 5432 in Iptables Firewall

with editord vi, cmedit nano edit file /etc/sysconfig/iptables  :
vi -w /etc/sysconfig/iptables

# add next commit row

-A INPUT -m state --state NEW -m tcp -p tcp --dport 5432 -j ACCEPT

restart iptables firewall

Configure postgres set superuser postgres password

# switch to postgres user

  su - postgres

# open postgresql cli as postgres and connect to the postgres database

  psql postgres

# set the password of user postgres using alter

 ALTER USER postgres WITH PASSWORD 'your-postgres-password';

Setting pg_hba.conf
pg_hba.conf say postgresql which users can access which databases and how they can do. ( centos/redhat location /var/lib/pgsql/9.4/data/pg_hab.conf)

so we change METHOD to md5 for IPv4 and IPv5 local connections
then we can add other ipv4 connection as

host    all         all         192.168.1.0/24        md5

at the end we can have something like this

# TYPE  DATABASE    USER        CIDR-ADDRESS               METHOD                    
                                                                                
# "local" is for Unix domain socket connections only                            
local   all         all                                      peer    
# IPv4 local connections:                                                       
host    all         all           127.0.0.1/32               ident
host    all         all           192.168.1.0/24             md5      
# IPv6 local connections:                                                       
host    all         all           ::1/128                    ident                     
# Allow replication connections from localhost, by a user with the              
# replication privilege.                                                        
#local   replication     postgres                            peer           
#host    replication     postgres        127.0.0.1/32        ident          
#host    replication     postgres        ::1/128             ident  

In order for the change to take effect we have to

reload pg_hba.conf
from the postgresql cli

 postgres=# select pg_reload_conf();

from the shell as postgres user ( su – postgres ) pg_ctl reload

Setting postgresq.conf
In this file we can configure remote access to postgresql
(centos/redhat location: /var/lib/pgsql/9.4/data/postgresql.conf  )

look for listen_address in connections and authentication section.
to enable remote connections uncomment and change listen_address that by default is ‘localhost’ so access is limited to local machine.
So at the and listen_addresses look like*

listen_addresses = '*'

It is possible to set the listen_address to specific IPs using a comma separate list.

Restart postgresql con

servicectl  postgresql restart

Now if you want you can change post value

port=  5432
Change port value 
Default port value for postgresql is 5432
Usually to change port value (ex:5433 ) we have to uncomment and to modify
# port= 5432
to
port= 5433
in Centos 7 we have to do another step we have to create the file /etc/sysconfig/pgsql/postgresql-9.4 with
PGPORT=5433
export PGPORT
touch /etc/sysconfig/pgsql/postgresql-9.6
echo ‘PGPORT=5433’ >> /etc/sysconfig/pgsql/postgresql-9.6
echo ‘export PGPORT’ >> /etc/sysconfig/pgsql/postgresql-9.6

If port change you have to change iptables firewall setting and restart postgresql.

we can check changes in postgesql cli :

# show listen_addresses;
# show port;

we can also do another check as root with

# netstat -nxl | grep PGSQL
netstat -nlp | grep PGSQL
unix 2 [ ACC ] STREAM LISTENING 263035 /var/run/postgresql/.s.PGSQL.5432
unix 2 [ ACC ] STREAM LISTENING 263037 /tmp/.s.PGSQL.5432

and

# netstat -nlp | grep 5432
netstat -nlp | grep 5432
tcp 0 0 0.0.0.0:5432 0.0.0.0:* LISTEN 28083/postmaster 
tcp6 0 0 :::5432 :::* LISTEN 28083/postmaster 
unix 2 [ ACC ] STREAM LISTENING 263035 28083/postmaster /var/run/postgresql/.s.PGSQL.5432
unix 2 [ ACC ] STREAM LISTENING 263037 28083/postmaster /tmp/.s.PGSQL.5432

Postgres blog’s post:

Cambiare l’owner degli oggetti in un database postgresql: type, table, sequence, view, index,special, function

Una comoda query per modificare l’owner di tutti gli oggetti presenti in uno schema del database postreSQL.

La query è ripresa dal blog garysieling:  https://www.garysieling.com/blog/postgres-change-owner-all-objects-in-schema

Sono state apportate poche modifiche la principale per consentire l’utilizzo del maiuscolo nel nome degli oggetti e una diversa organizzazione degli oggetti type, table, sequence, index, view e special.

La query utilizza pg_class per visualizzare gli oggetti: tipo, tabella, sequenza, vista, indice e special.

Nel campo pg_class.relkind viene indicato il tipo di oggetto. Di seguito i codici presenti in relkind:

  • table ordinary = relkind = r
  • table TOAST  = t
  • table foreign = f
  • sequence = S
  • view = ‘v
  • index = ‘i
  • special = s
-- FUNCTION: public.__chown_object(character varying, character varying)

-- DROP FUNCTION public.__chown_object(character varying, character varying);

CREATE OR REPLACE FUNCTION public.__chown_object(
	in_schema character varying,
	new_owner character varying)
    RETURNS void
    LANGUAGE 'plpgsql'

    COST 100
    VOLATILE 
    --ROWS 0
AS $BODY$

DECLARE
  object_types VARCHAR[];
  object_classes VARCHAR[];
  object_type record;
 
  r record;
BEGIN
  -- modifica owner tipi, tabelle, sequenze, indici e viste
  object_types = '{type,table,table,sequence,index,view}';
  object_classes = '{c,t,r,S,i,v}';
 
  FOR object_type IN 
      SELECT unnest(object_types) type_name, 
                unnest(object_classes) code
  loop
    FOR r IN 
      EXECUTE '
          select n.nspname, c.relname 
          from pg_class c, pg_namespace n 
          where n.oid = c.relnamespace 
            and nspname = ''' || in_schema || '''
            and relkind = ''' || object_type.code || ''''
            
    loop 
      raise notice 'Changing ownership of % %.% to % %', 
                  object_type.type_name, 
                  r.nspname, r.relname, new_owner, object_type.code;
                     
             
     EXECUTE 
       'alter ' || object_type.type_name || ' '
                || r.nspname || '."' || r.relname 
                 || '" owner to ' || new_owner;
    END loop;
  END loop;
  -- end modifica owner tipi, tabelle, sequenze, indici e viste

  -- modifica owner funzioni 
  FOR r IN 
    SELECT  p.proname, n.nspname,
       pg_catalog.pg_get_function_identity_arguments(p.oid) args
    FROM    pg_catalog.pg_namespace n
    JOIN    pg_catalog.pg_proc p
    ON      p.pronamespace = n.oid
    WHERE   n.nspname = in_schema
  LOOP
    raise notice 'Changing ownership of function %.%(%) to %', 
                 r.nspname, r.proname, r.args, new_owner;
    EXECUTE 
       'alter function ' || r.nspname || '."' || r.proname ||
       '"(' || r.args || ') owner to ' || new_owner;
  END LOOP; 
  -- modifica owner funzioni 

  -- modifica owner particolari 
  FOR r IN 
    SELECT * 
    FROM pg_catalog.pg_namespace n
    JOIN pg_catalog.pg_ts_dict d 
      ON d.dictnamespace = n.oid
    WHERE n.nspname = in_schema
  LOOP
    EXECUTE 
       'alter text search dictionary ' || r.nspname || '.' || r.dictname || 
       ' owner to ' || new_owner;
  END LOOP;
  -- modifica owner particolari  -

END;

$BODY$;

ALTER FUNCTION public.__chown_object(character varying, character varying)
    OWNER TO postgresql;

Plpgsql 

Postgresql 

Postgresql cancella record duplicati

Creare eliminare database e tabelle

installare Postgresql 9.4 su Centos 6.7 64 bit

postgresql  go to:  PostgreSQL nel blog 

Default postgresql server in Centos 6.7 x86 64 is version 8.4.x

to install postgresql 9.4.4 use   Postgresl yum repository.  .

su -

Download and install the yum rpm PostgreSQL Repository

wget http://yum.pgrpms.org/9.4/redhat/rhel-6-x86_64/pgdg-centos94-9.4-1.noarch.rpm

rpm -i pgdg-centos94-9.4-1.noarch.rpm

We can use yum list to check the package now available.

yum list postgresql*

you have to see many postgresql94 packages

Install, inizialize and start postgresql 9.4.

yum install postgresql94 postgresql94-server postgresql94-libs postgresql94-contrib

Than we initialize and start postgresql-9.4

service postgresql-9.4 initdb 

service postgresql-9.4 start

check that everything is OK

su - postgres  
pslq -l

we have to see a list of 3 databases

Open postgresql port 5432 in Iptables Firewall

with editord vi, cmedit nano edit file /etc/sysconfig/iptables  :
vi -w /etc/sysconfig/iptables

# add next commit row

-A INPUT -m state --state NEW -m tcp -p tcp --dport 5432 -j ACCEPT

restart iptables firewall

service iptables restart

Configure postgres set superuser postgres password

# switch to postgres user

  su - postgres

# open postgresql cli as postgres and connect to the postgres database

  psql postgres

# set the password of user postgres using alter

 ALTER USER postgres WITH PASSWORD 'your-postgres-password';

Setting pg_hba.conf
pg_hba.conf say postgresql which users can access which databases and how they can do. ( centos/redhat location /var/lib/pgsql/9.4/data/pg_hab.conf)

so we change METHOD to md5 for IPv4 and IPv5 local connections
then we can add other ipv4 connection as

host    all         all         192.168.1.0/24        md5

at the end we can have something like this

# TYPE  DATABASE    USER        CIDR-ADDRESS               METHOD                    
                                                                                
# "local" is for Unix domain socket connections only                            
local   all         all                                      peer    
# IPv4 local connections:                                                       
host    all         all           127.0.0.1/32               ident
host    all         all           192.168.1.0/24             md5      
# IPv6 local connections:                                                       
host    all         all           ::1/128                    ident                     
# Allow replication connections from localhost, by a user with the              
# replication privilege.                                                        
#local   replication     postgres                            peer           
#host    replication     postgres        127.0.0.1/32        ident          
#host    replication     postgres        ::1/128             ident  

In order for the change to take effect we have to

reload pg_hba.conf
from the postgresql cli

 postgres=# select pg_reload_conf();

from the shell as postgres user ( su – postgres ) pg_ctl reload

Setting postgresq.conf
In this file we can configure remote access to postgresql
(centos/redhat location: /var/lib/pgsql/9.4/data/postgresql.conf  )

look for listen_address in connections and authentication section.
to enable remote connections uncomment and change listen_address that by default is ‘localhost’ so access is limited to local machine.
So at the and listen_addresses look like

listen_addresses = '*'

It is possible to set the listen_address to specific IPs using a comma separate list.

Restart postgresql con

service postgresql restart

Now if you want you can change post value

port=  5432
Change port value 
Default port value for postgresql is 5432
Usually to change port value (ex:5433 ) we have to uncomment and to modify
# port= 5432
to
port= 5433
in Centos 6.7 we have to do another step we have to create the file /etc/sysconfig/pgsql/postgresql-9.4 with
PGPORT=5433
export PGPORT
touch /etc/sysconfig/pgsql/postgresql-9.4
echo ‘PGPORT=5433’ >> /etc/sysconfig/pgsql/postgresql-9.4
echo ‘export PGPORT’ >> /etc/sysconfig/pgsql/postgresql-9.4

If port change you have to change iptables firewall setting and restart postgresql.

Now we configure postgresql 9.4.x service to start at boot

Check

$ chkconfig --list | grep postgresql*
postgresql-9.4 	0:off	1:off	2:off	3:off	4:off	5:off	6:off

Setting

chkconfig --level 35 postgresql-9.4 on
chkconfig --list | grep postgres*
postgresql-9.4 	0:off	1:off	2:off	3:on	4:off	5:on	6:off

we can check changes in postgesql cli :

# show listen_addresses;
# show port;

we can also do another check as root with

netstat -nxl | grep PGSQL

and

netstat -nlp | grep 5432
tcp        0      0 127.0.0.1:5432              0.0.0.0:*                   LISTEN      3221/postmaster     
tcp        0      0 ::1:5432                    :::*                        LISTEN      3221/postmaster     
unix  2      [ ACC ]     STREAM     LISTENING     1592992 3221/postmaster     /tmp/.s.PGSQL.5432

Postgres blog’s post:

Cambiare l’owner di tutte le funzioni in un database postgresql

Talvolta può presentarsi la necessità di modificare l’owner degli oggetti presenti in uno schema del database postresql.
Di seguito un metodo per cambiare l’owner superuser postgres delle funzioni presenti in uno schema di un database postgresql utilizzando la console psql e il salvataggio  su file esterno .

Per elencare le funzioni presenti nello schema public si può utilizzare la query

SELECT p.proname, n.nspname,
       pg_catalog.pg_get_function_identity_arguments(p.oid) args
 FROM pg_catalog.pg_namespace n
 JOIN pg_catalog.pg_proc p
 ON p.pronamespace = n.oid
 WHERE n.nspname = 'public'

Posizionarsi in una directory in cui lo user postgres ha il permesso di scrittura oppure creare una directory ad hoc.

$ mkdir /home/postgres 
$ sudo su 
$ chown postgres:postgres
$ cd /home/postgres
$ su postgres

Avviare la console di postgresql e selezionare il database con lo funzioni il cui owner va modificato

$ psql
selezionare il database con le tabella da cambiare 
postgres=# \c eth2010

Per generare i comandi per la modifica dell’owner delle tabelle si può usare la query:

eth2010=# select 'alter function '||n.nspname||'.'||p.proname||'('||pg_get_function_identity_arguments(p.oid)||') owner to NUOVO_USER ;' from pg_proc p join pg_namespace n ON p.pronamespace = n.oid where n.nspname = 'public';

Il risultato della query sara del tipo

?column? 
 
 
-----------------------------------------------------------------------------------------------------------------------------------
-----------------------------------------------------------------------------------------------------------------------------------
 alter function public.chkpass_in(cstring) owner to NUOVO_USER;
 alter function public.chkpass_out(chkpass) owner to NUOVO_USER;
 alter function public._getsingleproductid(integer) owner to NUOVO_USER;
 alter function public._getmenu() owner to NUOVO_USER;
 alter function public.__getsetoflinks(integer, integer) owner to NUOVO_USER;
 alter function public._bblock_global(character varying) owner to NUOVO_USER;
 alter function public._catalog() owner to NUOVO_USER;
 alter function public._deletemenu(integer) owner to NUOVO_USER;
...
...
...
(217 rows)

salviamo la query nel file esterno alterfunctions_own ridirigendo l’output da terminale con

eth2010=# \o alterfunctions_own

rieseguire la query sostituendo NUOVO_USER con lo user desiderato.
Il risultato verrà salvato sul file esterno alterfunctions_own che conterrà a questo punto  un elenco di comandi alter function 

eth2010=# select 'alter function '||n.nspname||'.'||p.proname||'('||pg_get_function_identity_arguments(p.oid)||') owner to NUOVO_USER ;' from pg_proc p join pg_namespace n ON p.pronamespace = n.oid where n.nspname = 'public';

Per eseguire la lista di comandi alter function importare il file con

eth2010=# \i alterfunctions_own

psql:alterfx1_own.sql:3: ERROR: syntax error at or near "?"
LINE 1: ?column? ...
 ^
psql:alterfx1_own.sql:637: ERROR: syntax error at or near "317"
LINE 1: (217 rows)

Il file generato contiene in testa e in coda caratteri che non rappresentano comandi validi e che generano alcuni sintax error tuttavia  in genere non vale la pena di pulire il file.

Modificare l’owner delle funzioni di un database con una query plpgsql

La query cambia l’owner di tutte le funzioni del database in cui viene eseguita. Consente di precisare lo schema su cui agire in genere public  definito da:

  • in_schema = primo parametro
  • new_owner = secondo parametro
-- FUNCTION: public.__chown_functions(character varying, character varying)

-- DROP FUNCTION public.__chown_functions(character varying, character varying);

CREATE OR REPLACE FUNCTION public.__chown_functions(
	in_schema character varying,
	new_owner character varying)
    RETURNS void
    LANGUAGE 'plpgsql'

    COST 100
    VOLATILE 
    -- ROWS 0
AS $BODY$

DECLARE
  object_types VARCHAR[];
  object_classes VARCHAR[];
  object_type record;
 
  r record;
BEGIN


  FOR r IN 
    SELECT  p.proname, n.nspname,
       pg_catalog.pg_get_function_identity_arguments(p.oid) args
    FROM    pg_catalog.pg_namespace n
    JOIN    pg_catalog.pg_proc p
    ON      p.pronamespace = n.oid
    WHERE   n.nspname = in_schema
  LOOP
    raise notice 'Changing ownership of function %.%(%) to %', 
                 r.nspname, r.proname, r.args, new_owner;
    EXECUTE 
       'alter function ' || r.nspname || '."' || r.proname ||
       '"(' || r.args || ') owner to ' || new_owner;
  END LOOP;


END;

$BODY$;

ALTER FUNCTION public.__chown_functions(character varying, character varying)
    OWNER TO postgres;


Risorse:

Plpgsql 

Postgresql 

Postgresql cancella record duplicati

Creare eliminare database e tabelle

Mysql contro Postgresql

postgresql

MySQL e PostgreSQL sono i due database relazionali  open source più  utilizzati e 

mysqllogo

conosciuti. Lo sviluppo iniziale dei due database ha avuto obiettivi diversi. Mysql ha privilegiato la velocità, l’essenzialità mentre Postgresql l’aderenza agli standard e la completezza rendendo disponibili  diverse funzionalità anche se al prezzo di performance inferiori. Ancora per postgresql si affermava che gli sviluppatori di postgresql erano animati dall’obiettivo di portare in ambito open-source un database con l’impostazione dei database di Oracle ( “open-source” Oracle) . Grazie alla velocità e all’essenzialità, che in alcuni ambiti diventà semplicità, Mysql storicamente è stata la prima scelta nelle applicazioni web appoggiate a database.  Non va trascurato poi che Mysql è entrato nella “scuderia” Oracle.

Nel tempo la situazione si è andata modificando ed oggi i due prodotti stanno in qualche modo convergendo nel senso che le prestazioni di Postgresql sono decisamente migliorate mentre Mysql si è aricchito di funzioni. MySQL ( oggi alla versione 5.6)  rimane comunque il più utilizzato e se una volta lo era per la velocità e la praticità ora lo è per l’ampio numero di progetti in cui è estrato a far parte. Infatti quasi tutte le web application si basano o prevedono la possibilità di scelta di MySQL come database. PostreSQL ( oggi alla versione 9.3.1)  dal canto suo offre comunque una protezione dei dati superiore grazie al rispetto degli standard cosa che non accade con MySQL. Per gli sviluppatori di postgresql affidabilità e integrità dei dati rimangono un obiettivo irrinunciabile.

Architettura

Per quanto riguarda il funzionamento MySQL dispone di un strato SQL mentre può utilizzare più engine dati. Ad esempio il motore di archiviazione myISAM  può essere scelto per situazioni con  maggiore concorrenza in lettura e che non richiedono proprietà ACID. InnoDB per avere il supporto ACID anche se non completo.  Invece Postgresql è un database server unificato con un unico  motore di archiviazione.

Al momento gli elementi distintivi che più contraddistinguono i due e che vanno valutati nella scelta di un database SQL opensource sono l’aderenza agli standard SQL, la conformità ACID e la necessità di usare una piattaforma LAMP. Come affermato in premessa l’aderenza alla normativa ISO è sempre stata un tratto distintivo di postgresql. Quindi se si ha la necessità di sviluppare un progetto che abbia questa caratteristica postgresql diventa la prima scelta.

Porting

Se si desidera la possibilità di trasferimento (porting) del progetto, perchè è cresciuto molto, su database Oracle. Postgresql, rispettando  gli standard ISO per SQL, rende il passaggio sufficentemente agevole. Con MySQL questo non sarà possibile poichè non é conforme agli standard ISO e non segue l’impostazione ACID  Atomicità, Coerenza, Isolamento e Durabilità sono le proprietà logiche che devono contraddistinguere le transazioni) . Nel caso di MySQL il trasferiemento può richiedere una pesante riscrittura del progetto. LAMP e Riutilizzo del Codice Molti progetti girano sul LAMP (Linux, Apache, MySQL, PHP/Pearl/Python) web applications come WordPress, Joomla, Mediawiki, …. si appoggiano preferibilmente su MySQL. Molte di queste applicazioni non prevedono la possibilità di utilizzare postgresql pertanto la scelta operata a questo livello condiziona la scelta del database. Per quanto riguarda la possibilità di riutilizzo di codice va evidenziato che esiste molto più materiale, codice a disposizione per MySQL che per postresql proprio per l’ampia dissusione dello stesso nelle web applicaiton. Risorse:

Per un confronto più articolato : MySQL vs PostgreSQL – WikiVS

Nel blog:

Risorse:

SQLExpress 8 reset sa password Windows server 2008

Può capitare di non disporre o dimenticare la password dell’utente amministratore sa di SQL Express. In questo caso per resettare la password dell’ amministrator sa è necessario avviare SQLExpress in single mode.  Utilizzando SQL Manager Studio una volta  avviato SQLExpress in single mode la procedura per il reset della password di sa risulta decisamente agevole.

Per avviare SQLExpress in single mode accedere via pannello di controllo al servizio SQL Server (SQLEXPRESS)

Fermare il servizio premere il tasto destro del mouse sul servizio e nel tab General in basso inserire nel campo Start Manager l’opzione – m e riavviare il servizio premendo Start.


Poichè il single mode è permessa una sola connessione attiva controllare che SQL controllare che SQL Server Agent non sia in esecuzione.


Utilizzando il tasto destro del mouse “Avviare SQL Manager Studio” in modalità Amministratore < Run as administrator >.

Quindi modificare la password dell’administrator sa in <Security> <Logins>

Altra possibilità per avviare in single mode SQLExpress


Avviare SQL Server Configuration Manager

In Microsfot SQL Server Managemente Studio menu [View]  di Selezionare  [Registered Servers]

Nella sezione Registered Server selezionare il server premere il  Tasto destro del mouse e clikkare SQL Registered Configuration Manager. Seguirà la richiesta per avviare il servizio come amministratore.  A questo livello è possibile controllare il servizio e modificare i parametri


 SQL Server Configuration Manager 

Per accedere alle proprietà di SQLExpress si può premere anche il tasto destro del mouse in Object Explorer di SQL Server Manager Studio


Risorse:

http://msdn.microsoft.com/en-us/library/dd207004.aspx